Tools & Supplies
How to Prepare a New Calligraphy Nib (Why Ink Won't Stick)
New calligraphy nib won't hold ink? Learn why factory oil causes beading and how to prep a nib using soap, toothpaste, potato, or flame.
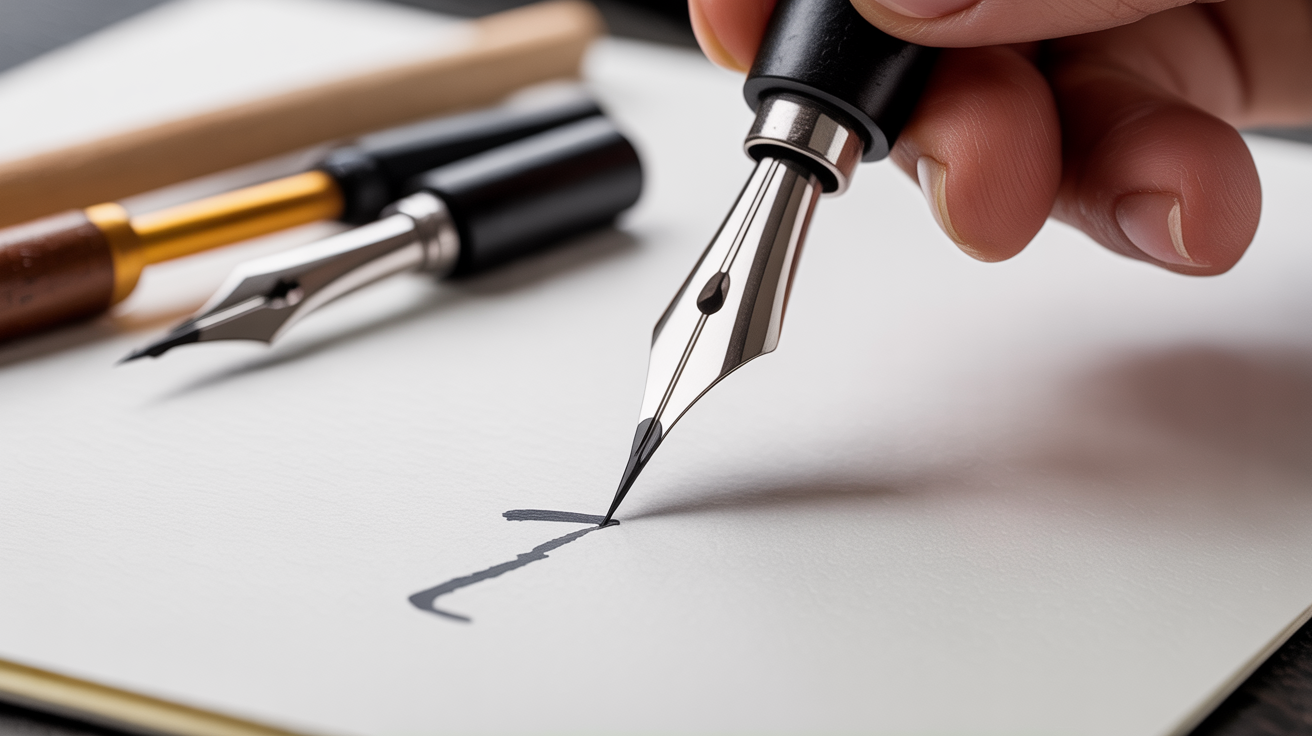
You dip your brand-new nib into ink, bring it to the paper, and the ink rolls straight off in a bead. Nothing sticks. You dip again. Same result. Before you blame the ink or the paper, know this: it's almost certainly the nib itself. New nibs come coated with a thin layer of machine oil or lacquer left over from the manufacturing process, and that coating actively repels water-based ink. The fix is quick and takes supplies you probably already own.
This guide explains what the coating is, why it matters, and how to remove it using four beginner-friendly methods.
Why Ink Beads Up on a New Nib
A nib is the small metal writing tip you attach to a pen holder. It has two prongs called tines that flex apart under pressure to create thick strokes, and a small channel or attachment point called the reservoir that holds a small supply of ink between dips.
Nibs are stamped from sheet metal in factories, and the machinery that shapes them uses oil to prevent friction and corrosion. Some manufacturers also apply a light lacquer to keep the nibs looking clean in the packaging. Both oil and lacquer are hydrophobic, meaning they push water away rather than letting it spread. Since most calligraphy inks are water-based, a factory-fresh nib simply won't let the ink wet the surface. The ink beads up and falls off before you even reach the paper.
Once you remove that coating, the bare metal is slightly rough on a microscopic level and water-based ink will cling to it normally. You only need to prep a nib once. After the first cleaning, rinse it with water at the end of each session and the ink will continue to flow well.
Method 1: Soap and Water Scrub
This is the most reliable everyday method and works for the vast majority of nibs.
- Hold the nib by its shoulder (the flat sides) to avoid bending the tines.
- Apply a small drop of dish soap or hand soap directly to the nib.
- Gently scrub all surfaces with an old toothbrush for about 30 seconds. Pay attention to the underside of the tines and around the reservoir.
- Rinse thoroughly under warm running water.
- Pat dry with a lint-free cloth or paper towel, then let it air dry for a minute before inserting it into your holder.
Test by dipping in ink. If the ink spreads evenly and clings instead of beading, you're ready to write.
Method 2: Toothpaste Scrub
Plain white toothpaste (not gel, not whitening) contains mild abrasives that scour the oil coating off the metal a little more aggressively than soap alone. This works well for nibs that still seem reluctant after a soap wash.
- Squeeze a pea-sized amount of white toothpaste onto an old toothbrush.
- Rub the toothpaste over every surface of the nib for about 30 to 60 seconds.
- Rinse completely under warm water, making sure no toothpaste residue remains in the channel between the tines.
- Dry and test with ink.
Because toothpaste is slightly more abrasive, be gentle. You're removing oil, not reshaping metal.
Method 3: The Potato Method
This one sounds unusual but works well and is especially gentle on delicate flex nibs. The raw starch and moisture in a potato's flesh neutralize the oil coating without any scrubbing.
- Cut a small piece of raw potato.
- Push the nib into the potato flesh and leave it there for 3 to 5 minutes.
- Pull the nib out and rinse it under warm water.
- Dry and test.
The potato method is a good choice if you're working with a very fine or fragile nib and want to avoid any mechanical scrubbing.
Method 4: Flame Method (Use Carefully)
Passing a nib briefly through a flame burns off oil and lacquer instantly. It works, but it carries real risk if you hold the nib in the flame too long. Heat can soften and warp a thin nib, ruin its temper, and alter how the tines flex. Treat this as a last resort or a fast fix when you have no other options.
- Hold the nib with metal tongs or grip it with a folded paper towel (not your fingers).
- Pass it through the edge of a candle flame or lighter flame for one to two seconds only. You want the faintest discoloration, not glowing metal.
- Let it cool completely before touching it. This takes longer than you'd expect.
- Rinse with water and dry.
Do not hold the nib in the flame. One or two quick passes is enough. If you're not comfortable with this method, stick with soap or toothpaste.
Comparing the Four Methods
| Method | What you need | Effort | Best for |
|---|---|---|---|
| Soap and water | Dish soap, old toothbrush | Low | All nibs, everyday prep |
| Toothpaste scrub | White toothpaste, toothbrush | Low-medium | Stubborn oil coating |
| Potato | One raw potato | Very low | Delicate or flex nibs |
| Flame | Candle or lighter, tongs | Low (high caution) | Quick fix, last resort |
For most beginners, soap and water is the right place to start. Move to toothpaste if soap doesn't do the job on the first try.
After Prepping: What Good Ink Flow Looks Like
Once the coating is gone, dip the nib about halfway up the tines into your ink. When you lift it out, the ink should cling to the nib in a smooth, even coat rather than rolling off in drops. When you touch the nib to paper and apply light pressure, ink should flow immediately. If it still skips or skids, the issue is usually one of three things: the nib isn't fully clean, the ink is too thick, or the paper is too smooth.
For guidance on choosing a complete setup, see our beginner's starter kit guide and our deeper look at how different nib types behave. If you're deciding between a straight or oblique holder to pair with your nib, this comparison covers the practical differences.
Frequently Asked Questions
How do I know if my nib is still coated? Dip it in ink. If the ink beads up and rolls off rather than spreading across the tines, the coating is still there. You can also look at the nib under a light: a factory coating sometimes gives the metal a faint sheen or slight color compared to a used nib.
Can I prep a nib that came in a kit or starter set? Yes, and you should. Even nibs packaged in beginner sets often still have the factory coating on them. The prep methods above apply to all pointed nibs regardless of where they came from.
Do I need to re-prep a nib each time I use it? No. You only need to remove the factory coating once. After that, a simple rinse with water at the end of each session keeps the nib clean and ready for next time.
My nib passed the flame test and still skips. What's wrong? Check that the nib is seated correctly in the holder. If the tines are splayed unevenly, the nib won't write smoothly. Also check that you're applying consistent light pressure and holding the pen at roughly a 45-degree angle to the paper. A very steep angle can cause the nib to catch the paper fibers instead of gliding.
How long does a prepped nib last? A well-maintained nib can last months or longer. The main causes of early wear are scrubbing it too hard during cleaning, pressing too hard while writing, and leaving it to dry with ink still on it. Rinse after every session and let it air dry fully before storing.